
This is Part 1 of a four-part tutorial in using Alveo. You can find the outline of the tutorial, and links to the other three parts on the Tutorials page. This Part will cover the basics of how to use Alveo to browse through and navigate corpus files, discover data, view data and keep data in lists for later analysis.
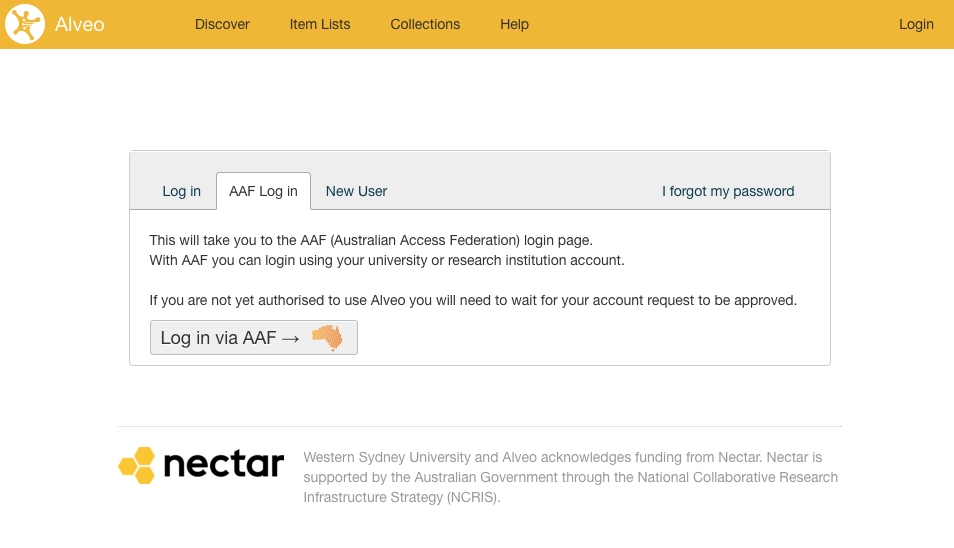
Logging in
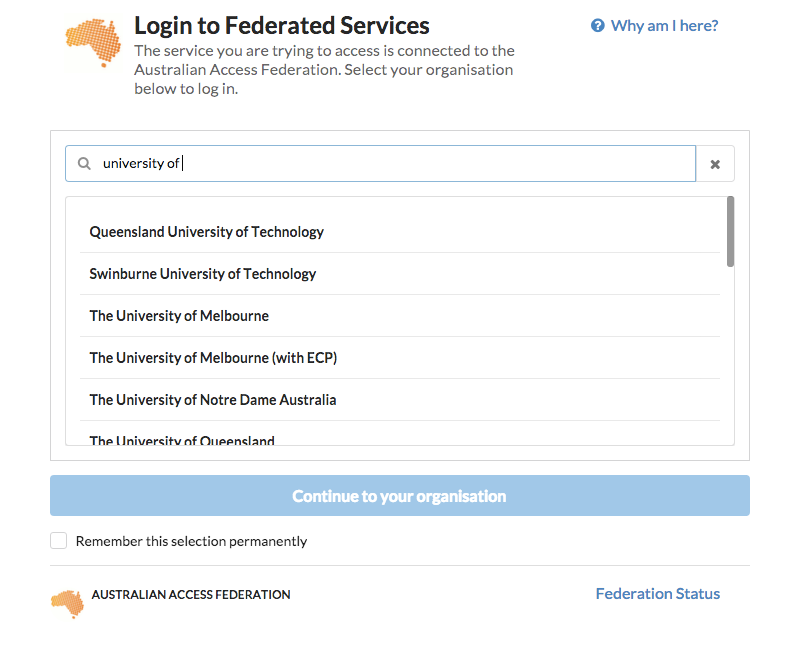
Log in to Alveo using the AAF method, and navigate down the drop-down list until you find your university. The first time you log in to Alveo, your account will need to be approved. Once you have been approved, you will receive an email and you will be able to log in using your AAF credentials, as shown.
What’s on the screen
When you successfully log in, you’ll see a window with four tabs in the top navigation bar, a left sidebar, and your institutional email address in the top-right.

The four tabs in the navigation bar are Discover, Item Lists, Collections, and Help. Discover is where you search or browse through the collections to find useful data. Item Lists is where you will keep the useful data that you find, so that you can analyse it using Galaxy. Collections contains information relating to each of the collections that is contained within Alveo. Help contains further documentation, including an extensive user guide, these tutorials, and a user support area.
In the top-right corner of the screen you will see your institutional email address. If you click here, a menu will open up with options such as your account settings, your API key, your saved searches and history, and your Licence Agreements.
Accessing & viewing data
Also, when logging in for the first time, you will not see any data collections yet. In order to access the data, you first need to visit the licence agreements page, and accept the terms of the various individual licence agreements of each collection if you wish to access them.
Follow the link to the Licence Agreements page and click on the link to Preview & Accept Licence Terms for the AUSNC (Australian National Corpus) collection list (a collection of collections). This collection list contains all the data collections that this tutorial will use.
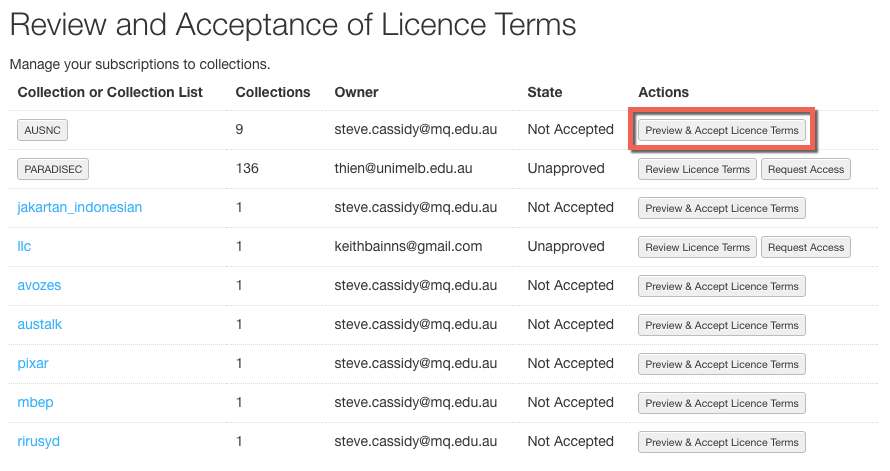
Once you have read and accepted the terms, you will have access to the AUSNC collections.
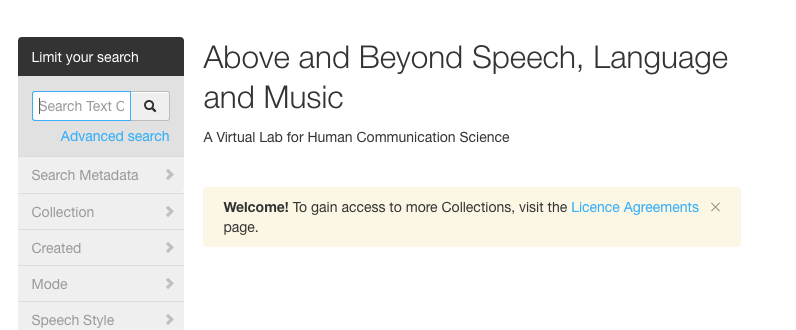
Now go to Discover (by clicking the Discover link at the top of the page). You will see nine collections in the left sidebar under the ‘Collection’ facet, including the ‘cooee’ and ‘ace’ collections.
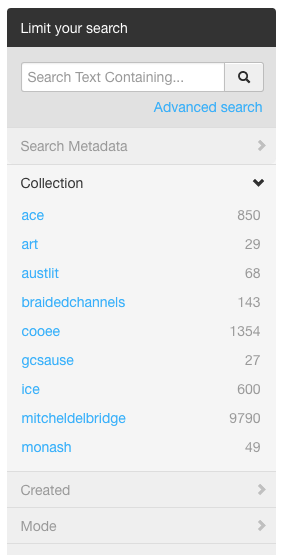
Filtering
You can browse through the data collections and navigate to data files using any one of several filtering facets, including the Collection, the date that the item was Created, the Mode of data, and others including Speech Style and Publication Status.
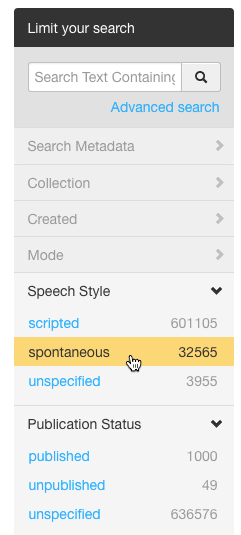
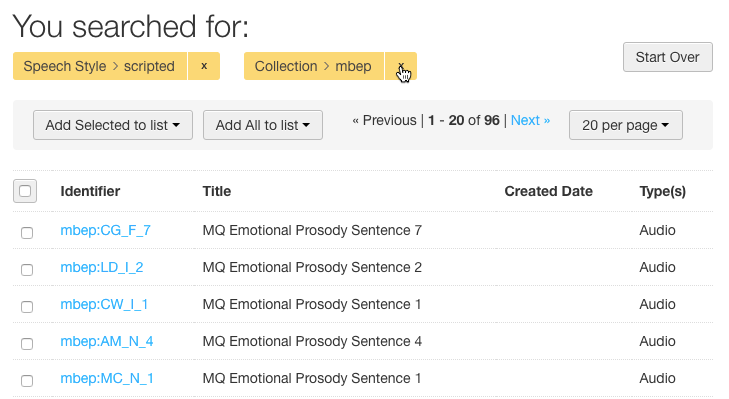
Each time you add a new filter, Alveo will show you the data files that match the search. You can remove a filter at any time by clicking the X in the filter area. You can also remove all filters by clicking Start Over.
Looking at data
You can look at an individual data file by clicking on its Identifier in the search results list.

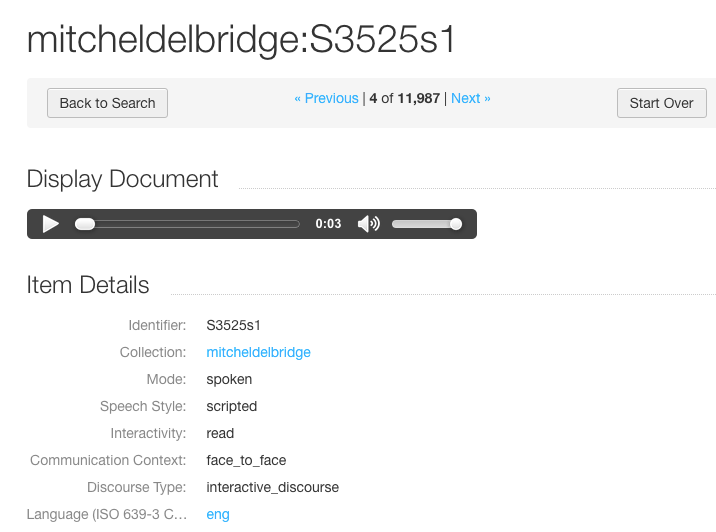
The view for an individual data file will contain a preview of the data, as well as the metadata for that item. The metadata contains vital information about the data, some of which is used for the filtering. Other metadata elements could include Word Count and Language (under Item Details).
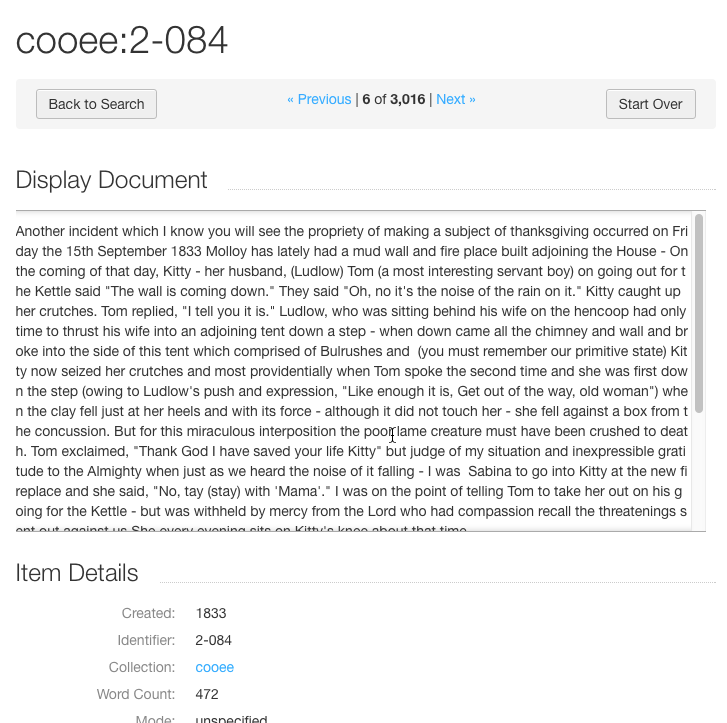
When viewing text documents, the text is displayed in the Display Document area of the page. Audio files also have a Display Document area, but it contains controls to play and pause the audio, as well as a scrubber for navigating back and forward throughout the audio file.
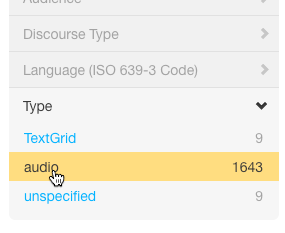
Click Start Over and select the Audio facet under Type.
Click on the identifier of one of the results to view the item, and notice that the Display Document area now contains controls to listen to an audio file.
Some items may have multiple documents within them. For example, text documents may have a text format version as well as a raw version or even an XML version. Other data types in Alveo include video, audio and images. Alveo provides tools to analyse all of these data types, but this tutorial will focus only on tools for text analysis, and so we will only be using text data.
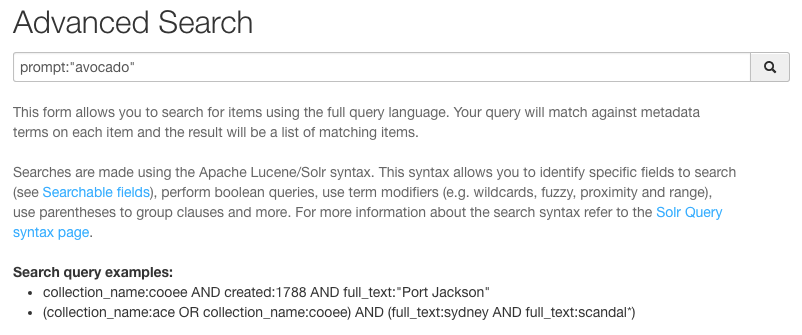
Advanced searching
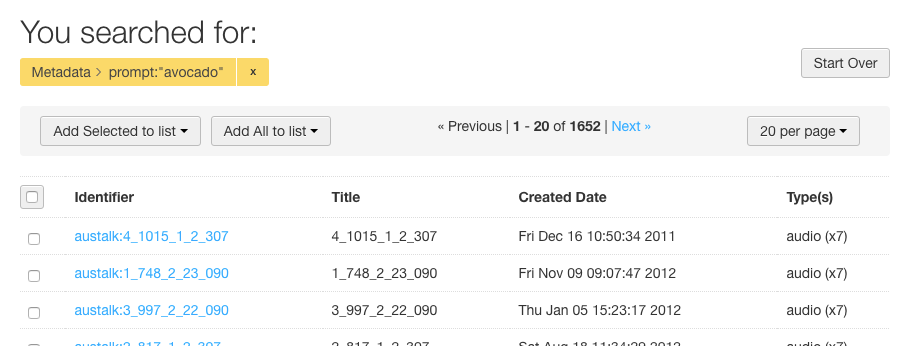
Alveo also supports an advanced search using any field that is contained within the item’s metadata. This is particularly helpful for searching through the Austalk collection, as the metadata contains fields such as ‘speaker’ and ‘prompt’. To see this, using the advanced search, search for prompt:”avocado”.
This will return all items that have a metadata field ‘prompt’ whose value is the word ‘avocado’. As ‘avocado’ was one of the words in the standard Austalk wordlist, you will see a large number of results, each containing a short audio file of different people saying ‘avocado’.
Creating and adding to lists
Lists enable you to collect data that you can use for analysis. Once a list is created, you can add items to it, share it with other users, or you can use for further analysis using the tools that Alveo provides (see Part 2).
A list can contain the entire contents of a complex filter, such as all documents from the Australian Corpus of English from a particular decade that are of type ‘Text’.
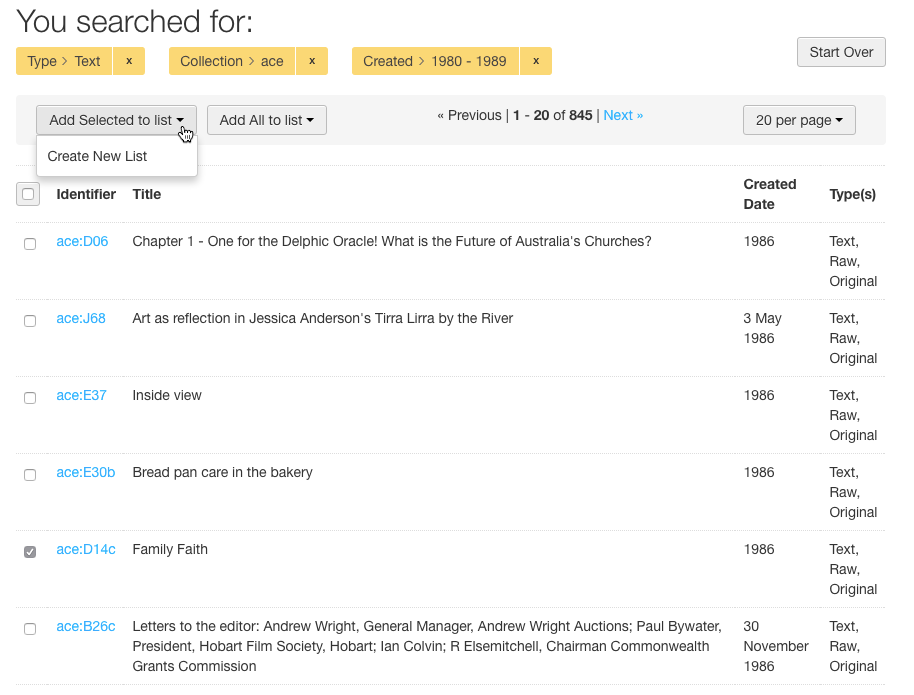
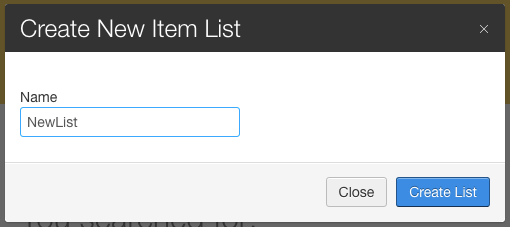
If you want all the results from your filter to be added to an item list, you can select Add All to List. If you have not yet created any lists, the only option here will be to Create New List. Give the new list a name and click Create.
If you want to create a list with only certain items, then select those items using the checkboxes, and click Add Selected to list. As above, if you have not yet created any lists, the only option will be to Create New List. Give the new list a name and click Create.
After you click Create List, you are taken to the Item Lists view.
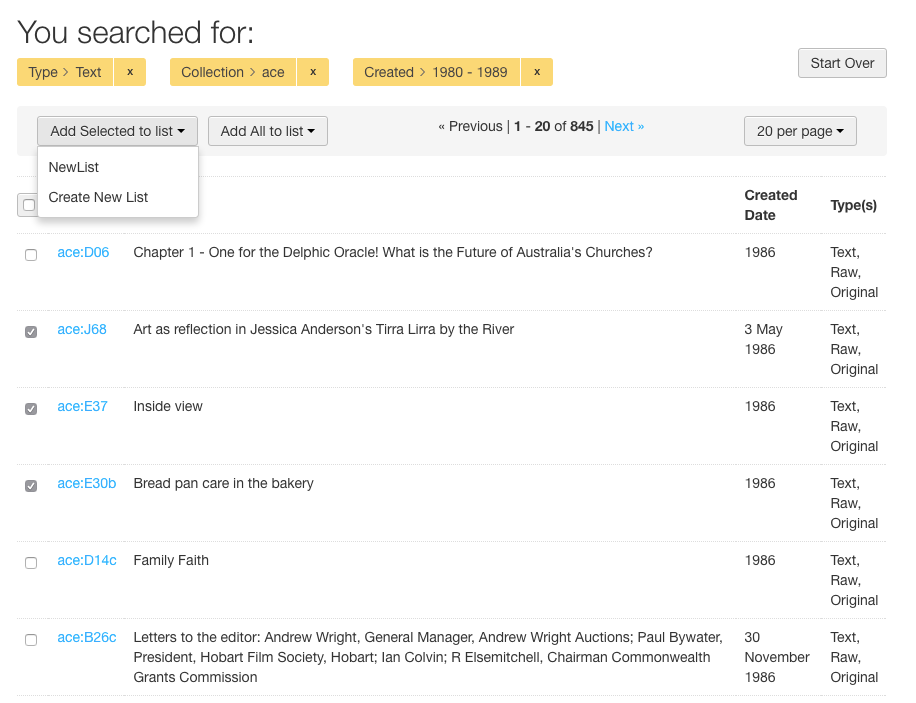
You can add further items to a list by returning to a search, checking an item or a number of items, and selecting Add Selected to List, and choosing the list you just created.
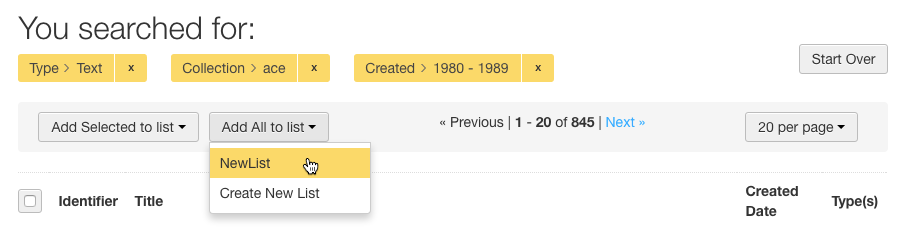
You can also add all results of a filter or search to a list by choosing the Add all to list option.
| Tutorial Task 1: Create a list containing all text documents from the cooee collection created between 1780 and 1789, and call this list Cooee_1780s. Tutorial Task 2: Create two more lists: one for the cooee collection between 1880 and 1889, and one for the ace collection between 1980 and 1989. Call these Cooee_1880s and Ace_1980s respectively. | |—|
Basic analysis
At this point you can run some basic analysis of the text documents. Select the Item Lists option from the navigation bar at the top of the page, and you will see your lists created in the last step among My Item Lists. Below this, there will be other people’s lists that have been made public.
Selecting one of your lists will show the items contained within in. You will now see options for running frequency and concordance analysis.

These analyses will allow you to interrogate the data in your lists for some simple tests. The frequency analysis will search for a term among all files in the list, and print out the number of times that term occurs among different facets.
To see this in action, select the Ace 1980s list, and search for the frequency of the word reckon with the Communication setting facet selected.
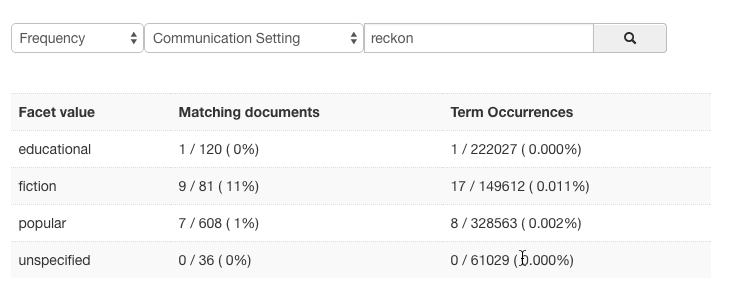
You should see that the word reckon occurs much more frequently in ‘fiction’ and ‘popular’, than in the other communicative settings.
Now run a concordance analysis for reckon. Instead of Frequency in the drop-down list, choose Concordance.
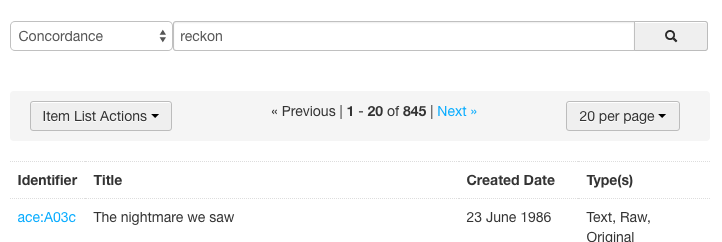
This will print out each occurrence of the word reckon with its context – a few words prior and after – which will give you an idea of the ways in which this word is used. Concordance analysis won’t allow you to select a facet, because it will return all instances of the search term throughout the list, rather than simply printing the number of occurrences.
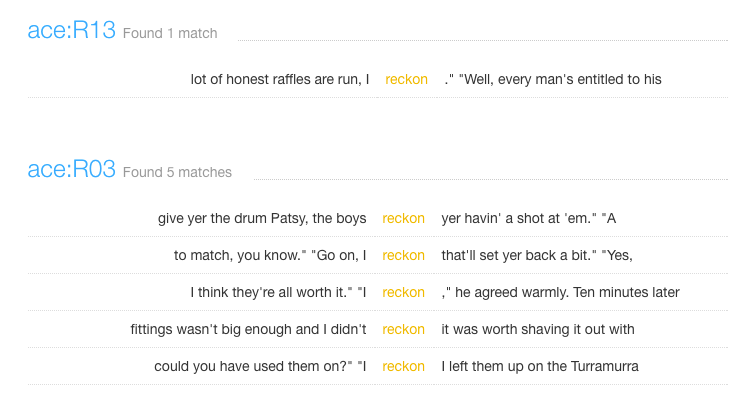
Having a quick look through the concordances, it becomes clear that reckon is more frequently used with the subject pronoun I, and almost never with some of the other subject pronouns such as you or they. It is also almost always used in the same structure, as a speech act verb.
| Tutorial Task 3: Create a new list containing all text documents from the cooee collection and run the same frequency and concordance tests on the word reckon. Compare the results. The first thing to notice is that the word reckon is used much less frequently in the 18th and 19th centuries than the 20th. Now, run a concordance analysis for reckon for the entire Cooee collection. There are only 21 occurrences, but the way the word reckon was used prior to the 20th century differs. 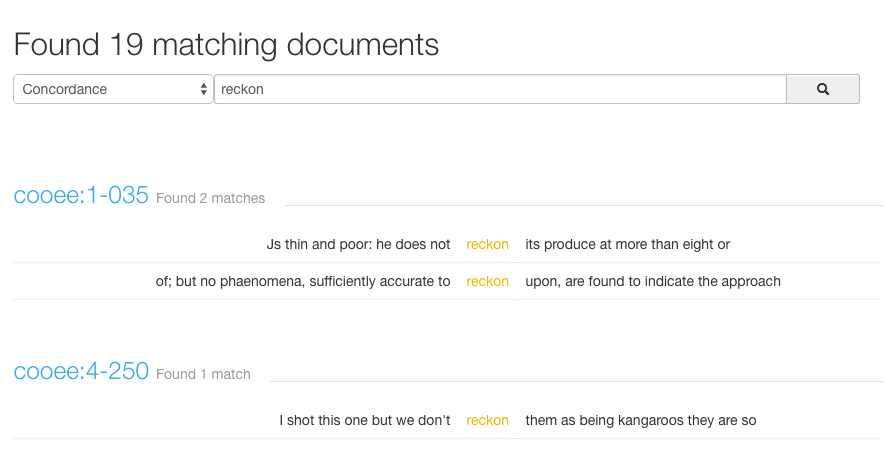 The concordance analysis demonstrates that reckon, rather than being a speech act verb meaning think, used to be a transitive verb meaning something like estimate. | |—|
Proceed to Part 2: Galaxy.